Choosing a theme and building your video around it using clips that support the theme can make your video more interesting to your viewers.
In this tutorial, I’ll discuss ways to gather clips and media to create an old time movie effect. I’ll also show you how to use Camtasia Studio to build and produce your Old Time movie.
Here is a sample old time movie made with Camtasia Studio:
Here is a link to the old time movie project. You can download the project zip file, import the zip file from within Camtasia Studio, and practice making your own old time movie. http://bit.ly/1Daewqz
Choosing the Right Component for Your Theme
There are several components that go into creating an old time video. Each of these is discussed below.
INCORPORATE THE RIGHT FONTS
To get that old time feel, you’ll need to incorporate the right fonts for your title slides. Don’t be afraid to use two or three fonts of font styles in each clip.
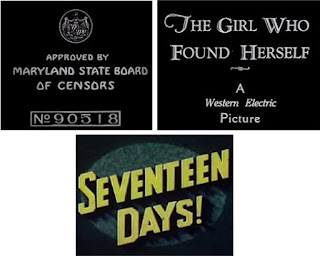
You can search the internet for free vintage style fonts. Or, we’ve included a site here: http://www.1001fonts.com/vintage+poster-fonts.html?page=5&items=10
Once you download your font, unzip the download file then drag the fonts to the Windows system font folder to install them. Once installed, they will be available in Camtasia Studio.
DRAMATIC TITLE SLIDE TEXT
Nothing says old time movie like bold, dramatic intro slides.
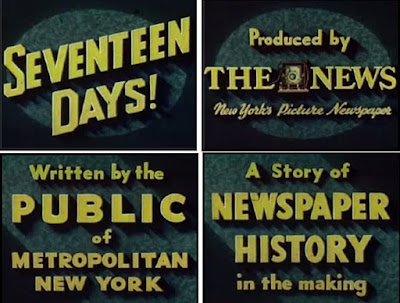
Instead of using just one intro slide, use several and beef them up with bold, authoritative words and colors.
Tip: The example video used one video background clip and text callouts were added to simulate individual title clips.
VINTAGE COLOR
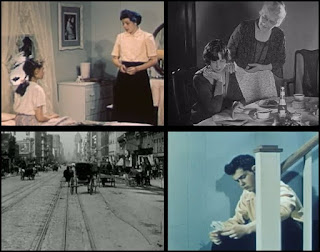
The color of vintage film can vary greatly depending on the year the film was made. Decide if you want a sepia tone, black and white, or color video.
You will change the color during the production process within Camtasia Studio.
Tip: The example video was set to black and white to give it an old look.
FUZZ, LINT, LINES, AND SNOW
No old time video will be complete without the lines, lint, and snow that are hallmarks of old celluloid video.
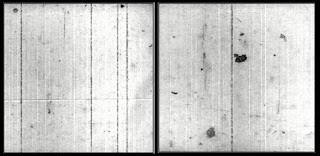
Tip: The example video added lint and snow during the production process within Camtasia Studio. Some of the media clips in the example project also had snow and lint already added to them.
COUNTDOWN LEADER
If you want your video to have an authentic old feel to it, you need a countdown leader. There are lots of free leader video clips on the Internet and on YouTube. Here is a page that gives you lots to choose from.
https://www.youtube.com/watch?v=Sp2LwVGsWeE
I chose a particular file to use in my example video (by Moville Media) since it had a great look and sound to it and it was free. It also came with separate clips of each of the components such as the background clip I used for the title slides.
You can find the download link under the Show More toggle button.
Download
SCRATCHY VINTAGE MUSIC
Scratchy, tinny, ragtime-style music is a hallmark of the old time movie. There are lots of free files to download from Archive.org’s 78 music section. https://archive.org/details/78rpm or browse by category here: https://archive.org/browse.php?field=subject&mediatype=audio&collection=78rpm
ADD CLIP SPEED TO REPLICATE OLD VIDEO
Many old videos have a slightly jerky, sped up feel to them. You can replicate this feel by increasing the clip speed for your live motion video clips.
To add clip speed to a clip, right-click the clip on the timeline and choose Clip Speed from the menu. Raise the percentage to speed up the video.
Tip: The example video raised the clip speed to 175%.
ABOUT THE QUICKTIME MOVIE FILTERS
During the production process, you will use the Quicktime filters to add special effects to your video.
Adding old time enhancements and effects via the filters can instantly turn your video into a sepia or black and white film with scratches and dust. You can also lighten, darken, and change the color of the video, add a posterize effect, sharpen or blur, apply a lens flare, and more.
However, these options can be a little tricky to use so here are a couple of tips to ensure your filters are applied correctly:
When applying the filters, make one change, then click OK to save the change. Then, re-enter the Filter options again to make the next change.

Check the drop down menus for other options.

it might take you several production tries to get the look you want. Just try one or two effects, produce your video to see if you like them, and if you don’t. Try something else.
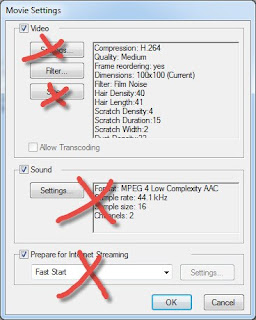
The settings you choose should show up in the Video group box in the Movie Settings dialog box.
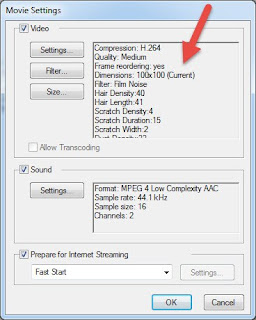
Don’t change any of the settings marked below.
PRODUCE THE OLD TIME MOVIE IN CAMTASIA STUDIO
Once you have completed your video project on the timeline, it is time to add the special effects and produce your video.
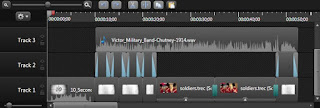
Note: During this process, you will be creating a .MOV file. If you desire an MP4 video file, start a new project in Camtasia Studio, add the .MOV file to the timeline, then produce it as an .MP4 video.
- In Camtasia Studio, click the Produce and Share button. The Production Wizard appears.
- From the dropdown menu, choose Custom Production Settings. Click Next.
- Choose the MOV – QuickTime movie option. Click Next.
- Click the QuickTime Options button. The Movie Settings dialog box appears.
- Click the Filters button. The Choose Video Filter dialog box appears.
- From the list Filters and Special Effects, choose the desired settings.
- When done, click OK.
- In the Movie Settings dialog box, click OK.
- Click Next. Continue on through the Production Wizard.


0 comments